Manage Your Music with Multiple Playlists
Stockmusic.net team

Manage Your Music With Playslists
What Are Playlists?
Playlists are sets or ‘folders’ that you can create using your own or other artists tracks on Stockmusic.net. You can create and view your playlists through your account page, or by clicking the Add to Playlist button
All playlists by default are private. Making the playlist public or private will not have any effect on the privacy settings of the tracks within the playlist. All individual tracks within your playlists are still visible and available for purchase on the site.
 Create A Playlist
Adding Music to New Playlists
Adding and Removing Music
Editing Your Playlists
Playlist Privacy Settings
Sharing Playlists
Create A Playlist
Create A Playlist
Adding Music to New Playlists
Adding and Removing Music
Editing Your Playlists
Playlist Privacy Settings
Sharing Playlists
Create A Playlist
To create a playlist from a selected track or collection, click on the Playlist Button ![]() that is located to the left of the price.
that is located to the left of the price.
- Click the + button at the bottom of the pop up menu
- Type the name of the playlist you want to create
- Click Add.
- Click the orange + button to create a new playlist
- Type the name or title for your playlist
- Enter a description or note for reference (optional)
- Click Create.
- Remember, all playlists are private by default.
This will create the new playlist and add your selected track or music collection to it. You will know which tracks and collections you have saved by the orange color of the Add to Playlist Button. All tracks you have added to a playlist are identified by their “active” orange color.
Adding Music to New PlaylistsTo create a playlist from a selected track or collection, click on ‘Add to playlist’ button that is located to the left of the price.
- Click the + button at the bottom of the pop up menu
- Type the name of the playlist you want to create
- Click Add.
This will create the new playlist and add your selected track or music collection to it. You will know which tracks and collections you have saved by the orange color of the ‘Add to playlist’ button. All tracks you have added to a playlist are identified by their “active” orange color.
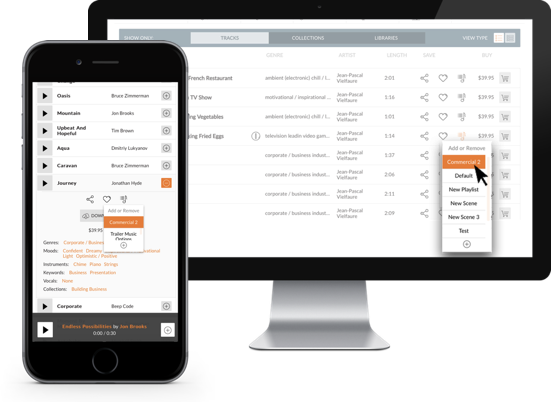
Adding and Removing MusicTo add music or sound effects to any of your playlists, click the playlist icon or the + icon (mobile) located on any track or collection.
- Scroll to find the playlist you want to add that track to from the pop up menu
- Select the playlist name you want to add the track to, or…
- Create a new playlist for that track by clicking the + icon at the bottom of the menu.
Remember that the Playlist Button ![]() will turn orange once you have added your track to the playlist. All tracks that have the orange playlist icons are tracks that have been added to a playlist.
will turn orange once you have added your track to the playlist. All tracks that have the orange playlist icons are tracks that have been added to a playlist.
You can remove items from a playlist at any time by clicking the active Playlist Button for the track you want to remove. You can also remove tracks directly from the Playlists themselves by opening the playlist directly from your Playlist Tab and clicking the active Playlist Button or the Trash Button for the track you wish to remove.
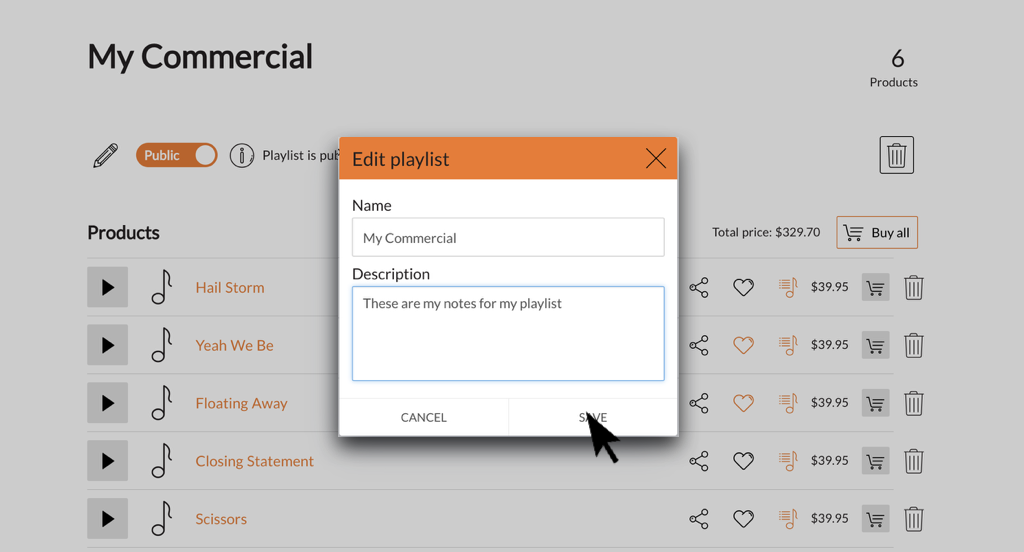
Editing Your PlaylistsWhenever you create a playlist you must give it a title. Descriptions for your playlists are optional but recommended, especially when you are working with a lot of music. If you are juggling multiple projects, it can be helpful to include notes regarding the types of music and placement of music in each playlist.
Some helpful things to include in the description are…
- Audio cues
- Scene settings
- Music genres
- Emotions and feelings
- Tempo
- Go to your Playlists Tab and click on the playlist title or the edit button.
- Change your title and add/update your description (optional)
- Click the Save button to save your changes and exit.
By default your playlists are private but they can be made public easily for sharing on through your Playlists Tab.
- Go to your Playlists Tab by clicking on your account in the navigation menu.
- Click on the Edit Icon or Title of the playlist you want to make public
- Click the private Privacy Button below the description to make the playlist public
- A pop up confirmation will appear with the link to your playlist and the option to email it.
You can easily see if your playlist is set to private or public. At any point you can change the privacy to a playlist by clicking the active Privacy Button from public to private. Having your playlists public will not result in them appearing in search results.
Sharing PlaylistsIn order to share your playlist, you will need to make sure you have changed the privacy setting from private to public. Once you have made the playlist public, you will be able to share the playlist directly from the pop up Playlist Info screen below. You can share your public playlists at any time by clicking the ‘Playlist is public. Click to see info!’ next to your privacy settings while you are viewing your playlist.
- Enter the email of the individual to whom want the playlist sent to and press Send.
- Copy the playlist link and send it through an alternate channel, e.g.; social media, private message, personal email